 Posted by Admin
in
Posted by Admin
in 
(Edited 11/13/2017)
DISCLAIMER: No matter what you do, any boxed henna will be a pain in the butt to wash out, and there's nothing you can really do to get rid of the smell if it's not your cup of tea. Also, let it be known that henna is semi-permanent. Therefore, it will gradually bleed out whenever you get your hair wet for the first week and a half or so, before settling to a more natural looking color. The strong henna smell also tends to go away in the first two weeks, in my experience.
HOWEVER, many people don't realize that there are ways to make the application process much easier. I've been dying my hair with Light Mountain for years and while at first the mixture often ended up too dry and clumpy, I've finally achieved the perfect dye.
Here are my steps:
1) I mix about a box and a half of this henna for my long hair, using ginger tea (made with boiling hot distilled water), lemon juice, nice smelling spices (cinnamon, nutmeg, etc.), and a little bit of plain yogurt. I make sure to stop adding in things when the mixture is thick and creamy, and take extra care to make sure all powder has been mixed in.
2) Then, I let the hot mixture sit there for about an hour, covered with plastic wrap.
3) While the mixture is steeping, I wash my hair with shampoo and conditioner, then blowdry it until it's almost fully dry and add in some argan oil to the bottom 2/3 of my hair, skipping the roots (I have a LOT of hair). I also apply a bit of vaseline around my forehead and neck to keep the henna from dyeing my skin.
4) When applying the henna, I section my hair bit by bit from the bottom up using hair ties. I use my left hand to tug on the section I'm working on to make sure I'm hitting every side of the roots, and use my right hand in a plastic glove to glop on the henna.
5) IMPORTANT TIP: As I'm applying the henna, I also found it helpful to stir and add a little spoonful of yogurt as I go if the mixture starts to become dry in some parts.
6) When all roots and most of the body of my hair have been covered, I wrap my hair up in plastic wrap and sit under a bonnet dryer for a full hour under the hottest setting. I have never tried the method of simply leaving this in my hair for several hours, but I'm sure that works fine as well.
7) When I rinse out my hair, I don't use shampoo at all. I generally use conditioners that have tons of oils in them (e.g. coconut and argan oil) to facilitate the detangling process. It still takes forever to get it all out because my hair is so long and thick, and when I'm finally done with the second rinse I pat my hair dry and put in more argan oil to rescue it from the damage. I tend to lose a lot of hair in the process.
8) I try to wait at least a day and a half to wash my hair, and when I do I sometimes only use conditioner. Over the next day or two after dyeing my hair, the color tends to become darker. Just something to be aware of with henna in general.
This makes it sound completely awful and while those 4 hours of mixing and applying and sitting and washing suck, it's totally worth it. Henna has done wonders for the health of my hair and makes it look absolutely spectacular in the sunlight. I've received so many complements by friends, family, and hair stylists. Chemical dyes are NOT worth the convenience!
SUMMARY: Make sure you're allowing the henna enough time to sit to release it's color. Use yogurt to make the mixture creamier and easier to apply/stick to your roots. Also use lots of oil when washing it out and afterwards to complement the conditioning properties of henna.
EDIT 11/13/17: I have short hair now, and surprise surprise, the process is much less difficult now!
I really liked how the "Red" (pure henna) worked for me. After doing lots of reading about henna and henna blends, I chose Light Mountain because of price and because it isn't blended with anything other than henna. I have medium-dark brown hair naturally, about 5% gray now, and had chemical highlights in when I first used it. I mixed 100 grams with 1/4 cup of yogurt and some apple cider vinegar (any fruit acid will do, but they react differently with your mix depending on chemical composition and antioxidant level), and added warm distilled water until I got a yogurt consistency. Then covered with plastic wrap and left in a warm spot for three hours until the dye released (you can see red liquid start to accumulate on the top when it's ready).
I applied to my hair with a plastic bag with a small hole cut into the corner, and piping it on at the roots, working my way to the ends in sections starting at the top of my head and wrapping each section into a large bun until complete. I covered it using the plastic "cap" enclosed, and secured with a headband, and let it sit for 6 hours.
HOLY MOLY it gave me the best red, and I used to have a colorist put three shades in back when I was using salon color. I have also suffered from scalp psoriasis for YEARS, which was getting painful and serious, but since using henna it's been completely gone. My hair feels fuller, thicker and healthier, has great dimension, and i even have some new hair growth (which i attribute to the psoriasis healing). I am addicted to this stuff now.
A few words of caution:
- Of course, its messy. plan accordingly. lots of tutorials online for this process.
- Don't shampoo when rinsing out the henna, just condition, and try to give it 48 hours before shampooing again.
- The grassy smell can get overwhelming, and doesn't clear for several washes. Neither does the dye, so plan on using dark towels for awhile.
- If you want to keep the red bright longer, use a high-antioxidant acid, like cranberry or blueberry juice in your mud. It won't change the color, just help it stay bright longer.
- Be aware that heat and heat styling darkens henna fast. If you are married to a blowdryer or styling irons, your color will darken to an auburn within a couple of weeks. That happened to me. I still love it, but wasn't aware that it would darken.
- As long as you use pure henna or henna/cassia blend (no indigo), you CAN safely highlight your hair after using henna. I like to get salon highlights, then re-henna a week later for a nice vibrant color.
- Henna does not come out entirely, and is considered permanent. This particular brand seems to be a lower-dye variety, and as my roots grow out there is no noticeable line at all unless you see it in direct sunlight.
- Your hair will look different in just about every light. In a dimly lit room, my hair looks dark auburn now. In the sunlight, it's still quite red.
Pics are before and after henna (the before pic was taken several weeks earlier - don't know why they are sideways!)
This is my first time I’ve ever dyed my hair and I don’t regret it at all!! Not only did it make my hair a beautiful, rich red with golden highlights (I used chamomile tea instead of just water) but it also conditioned my hair and made it look healthier than it ever has! I now have more volume and thicker hair, and it looks so natural. Everyone keeps complimenting it not knowing it’s dye! I’m a natural dirty blonde and left it on my hair for four hours.
I don't normally write reviews, but this product is AMAZING! This was my first try at henna and I'm really happy with it.
After reading a million recipes online this is what I went with:
Fox henna
2 bags pomegranate raspberry green tea in 2 cups of water
1 tsp paprika
2 or 3 tsp heaping scoops of plain Greek yogurt
5 drops of lemongrass oil for scent
I let it sit for 2 and a half hours, the applied it to my hair. I had SO MUCH henna left over so I plan to freeze it.
I let the mud mixture sit on my head with the plastic wrap for about 3 hours wrapping a hot towel out of the dryer around my head every 30 mins.
I then rinsed with just water in the kitchen sink. It came out super easily and faster than I thought. I'm so happy with the result! The after picture is the next morning!
I absolutely love Light Mountain henna for my hair!
The color is amazing, natural looking, and tends to last about 3 months.
I have been using this brand for 3 years and my hair has never looked healthier. It’s manageable, shiny, and my curls soft, bouncy and no frizz in sight. I no longer get split ends, trimming every 6 months. I have a few gray/silver hairs near my temples and it covers them, leaving them looking like natural highlights.
A couple of things I personally do is always use bottled water, I add either egg white or plain yogurt for conditioning. I always add a few drops of essential oils; neroli for scent, rosemary and sage. I add paprika or ginger for enhancing color.
I apply it using gloved hands.
I wrap my hair/head afterwards using Saran Wrap and apply heat with my hair dryer once an hour.
It’s fairly fail proof. I’ve used it for so long that I tend to not go over the directions and twice have forgotten to apply to wet hair and I still get great results on dry hair too.
I try to go for the full 4 hours. The shortest I’ve let it sit in my hair is 2.5 hours and it looks just as good.
For prep I tend to make the day before but have gone as long as 3 days before being able to apply it.
I only use conditioner for rinsing it out.
The scent is very earthy. If you use a lot of natural herbs and teas, it will not be an unfamiliar smell.
Compared to other brands I’ve used previously, it’s the easiest to prepare and rinse out. Plus the largest variety in color to choose from.
A few tips: prep your skin with Vaseline, wear something you do not plan to wear again and put newspaper on your floor (though now, I’m fairly proficient, I don’t find necessary) and section your hair off in plastic clips before you get started for ease of application.
Do not use metal bowls or spoons. Stick with plastic or wood and do not use them for cooking after using for the henna. I have a plastic mixing bowl and spoon I purchased from the dollar tree that’s reserved for my henna use only.
5 years ago I decided to take a leap to using henna for my hair care and so glad that I did and wish I would have not been so nervous about using it sooner.
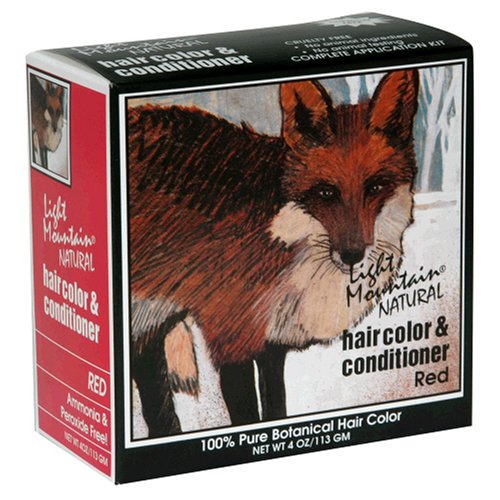
I have medium brown hair with red highlights naturally. I prefer using the “red” color (with fox on box) but have used the auburn and bright red in the past but I like the brighter red tones with the red color.
My hair is thick and goes past the bottom of my bra strap and 1 box is more than enough, with extra left over.

Feature Product
- A complete all natural hair color and conditioning program.
- Recommended by safe shoppers bible. Non-carcinogenic
- Conditions and adds body to hair while it colors.
- Includes hat, gloves and step by step instructions.
Description
Chemical free. 100% Pure botanical hair color. Cruelty free. No animal ingredients; No animal testing. Complete application kit. The complete all natural hair color conditioning program. Free of harsh peroxide ammonia! Plus fully illustrated instruction includes cap gloves.
I have used this product for years. I have even used it after a perm.
For me I don't want a strong Red so I mix it with coffee. I make the coffee the night before and let it cool, then I combine it with the henna and let it rest overnight. In the morning I apply it to my hair. Most of the time I do not use heat, instead I leave it on for 4 hours. Then rinse my hair forever, condition it....then rinse some more. I wait three days before I wash it. I have short hair so one box will do two treatments. I have shared some photos, I know they are not the best for hair shots but it will give you an idea. My hair is like a reddish brown naturally...more brown than red. This treatment just kicks it up a notch and looks amazing in the sun.
I do keep my hair permed while using this product. When I know I am going for a perm I will not use henna for three months, giving my hair a chance to grow out a bit. I wash my hair the day before with a clarifying shampoo and tell the hair dresser not to condition it "before" the perm. And NEVER let them do a heat perm. My perm will take better...not perfect but better. I do not wash my hair for three days, on the third day I cover my head in coconut oil wrap it in plastic and let it sit all day...then wash it. One week after my perm I use the Light Mountain Henna.
I would give this ten stars if I could. So this was my first time EVER using henna, and I gave Light Mountain in Red a try. And you know what, aside from taking a bit longer and having a few extra steps, the whole process was just about like using the chemical dyes I've been using for the last 25 years. I followed Light Mountain's instruction sheet exactly. I used distilled water, boiled it in a glass measuring cup, added it to the henna which was in a plastic measuring cup, stirred with a plastic spoon, covered with plastic wrap and let it sit the full 3 hours before application. I added nothing but the water. I kept reading about lemon juice and vinegar and oils and in the end just decided simpler would be better and I could always try them next time - but I won't be doing that now, because I got utterly perfect results with just the henna and water mix. Application was gross, but not any more difficult than applying chemical dye (I do have quite short chin length very fine thin hair though). The smell I kept reading about was not even an issue once the henna was on my head and wrapped in plastic (it does have a distinct aroma - I kind of thought it smelled like the nori I use to make sushi, or even green tea leaves? Whatever, it wasn't nearly as bad as I was expecting). I did leave it on the full 4 hours. I was expecting a nightmare getting the sludge out of my hair. Nope. Just hung my head over the side of the tub and rinsed with the detachable shower head, no more difficult to get out than a regular dye. I did do a quick conditioner wash with a cheapie conditioner to scrub my scalp and make sure all was clear. I then put a leave in conditioner in and my gel and was on my way. It has been 48 hours, I will be shampooing for the first time tonight, but I don't expect any problems. I love the color SO much. It is such a beautiful, natural, vibrant shade of orangey red. And the best part of all, my hair feels awesome. I have thin, fine, curly hair and it feels plumped up and slicker and the frizz reduction was amazing. I will continue using this product in this shade indefinitely, or at least until there is just too much gray to cover (which by the way - gray coverage was EXCELLENT, far superior to any red chemical dye I have ever used). The only thing I have to complain about is that I wish I had tried this years ago - think of all the chemical exposure and hair damage I could have saved myself from!!!
I started thinking about henna dye like a year ago. But Ive been growing my hair since 2014 after endometrial cancer cause i use to wear it super long and curly. NOW i went get my keratine treatment in a hair salon, the girl cutted to much. So that made me take the desition of do it myself on the red henna dye. Since i got natural ash medium brown hair, I highlight my hair with manic panic lightner. Wash it very well and condition
Then the mixture begain:
2 lemons
1 pack of paprika
Like 8 bags of organic green tea
2 packs of light mountain natural hair color on red.
Let it sit for 2 hrs and on my hair 2 hrs wrapped a towel and a plastic bag over my head.
Came out amazing ♡ I will continue with this organic version of hair salon dye for the rest of my life definetly.
Did my eyebrows too, wash it with baking soda water and conditioner. Then shampoo it and used the Aria star organic Argan threatment ♡
This is my go to henna. I've been using it for years now and the results are just want I want. I get a great, deep red without the chemical damage and the "you just dyed your hair" look. It looks so natural that no one can tell I've dyed it. It's semi-permanent, but I don't need to redye until my roots grow out--sounds permanent to me!
My main tips are to use the right amount of boiling water per pack (12-16oz), NEVER use metal, apply to freshly washed and damp hair, let the henna sit for at least an hour before applying and after, and do not use shampoo for the next couple of days. Honestly, the process is probably the most annoying about this experience since it takes so long--generally about 3.5 hours total (1 hour to "brew", 1 hour to apply, 1 hour to set, and probably 30 to rinse), but the results are soo worth it.
I do have to mention that I've gotten expired henna from Amazon before (tsk tsk) and I've had to redye. Make sure that your product is within the expiration date and says "RED" on the packet before opening and using.
I have been using henna for 30+ years and I especially like this brand though 100 percent natural henna is pretty much all the same.
Like many home coloring treatments, you have to get used to mixing and applying it.
Put some of the henna in a glass bowl. You will have to experiment over time in terms of how much to use. I put perhaps a quarter to a third of a cup (dry measurement) into the glass bowl depending on the length of my hair which can vary from above the shoulders to three inches below the shoulders. I have fine wavy hair.
Heat a cup of water in the microwave. Do not make it super hot because you are going to put it on your head but it has to be warm enough to mix with the powdered henna. Add some of the water to the henna and whisk around with a fork. If it is lumpy, add more water. If it's too liquidy, add more henna. You want the consistency to be liquid enough to spread into your hair from roots to tips. Too liquidy will make a mess. Too lumpy will mean you won't get good coverage of your hair. Henna does NOT stain glass or metal utensils. It will wash away clean with hot water. (I do this b/f putting the bowl and fork into the dishwasher.)
You need gloves to apply the henna. You will also need plastic wrap or a disposable shower cap. Once the henna is on your hair, wrap it. Use warm water and a towel to wash the henna off your face, ears, and neck. Henna comes off the skin easily so don't panic. Henna comes out of most fabrics too but I use old towels and an old shirt when I put henna in my hair.
I have left the henna in my hair for as long as five hours. If I'm home doing work, I just leave it in. You can also wash it out in ten, fifteen, thirty minutes. The resulting color will be about the same no matter what.
When you're ready, wash the henna out with warm water. I use the sink rather than doing this in the shower because it can get a bit messy. Once you wash the henna out, use your regular shampoo and conditioner and wash your hair as you usually do. NOTE - for the first few washes, the henna color will come off on your towels. In the 30+ years I have used henna, I have never ruined a towel or clothing. It washes out but as I said before, I use old towels and wear an old shirt when I do henna.
Your hair may smell "henna-ish" until you wash it a couple of times. It's not an offensive smell and I have never had anyone say anything about the smell. Put some product in your hair if you want to mask the smell.
If you are unhappy with the color, add baking soda to your shampoo when you wash your hair and it will come out quite quickly. Remember - henna is not a permanent chemical dye; it washes out quite subtly over time. If you have grey, henna will color it but it will be a "lighter shinier" color than the rest of your hair. I have grey and I use red henna. My real color is a couple of shades darker than the henna. After using henna, my hair looks lovely because the grey hair is a tiny bit accentuated.
As my hair grows out, I do not get that telltale line of "here's my (chemical) hair dye and here's my real color." I usually do henna every six weeks and sometimes in between I will just do the roots and around my face. My hair grows quite quickly.
Don't give up on henna after using it just once. Get used to mixing and applying it before you decide if henna is for you or not.
VERY IMPORTANT NOTE - This review is about red henna. If you want to use black henna, do a lot of research first.
0 comments:
Post a Comment